Monday, September 21, 2009

Emerald Green Bracelet

So I’ve been dabbling with the idea of making beaded jewelry since I was in community college (about eight years ago) when my good friend Kara was taking a jewelry making class and we would take trips to various shops that sold beads.  About a year ago I saw these green beads that I just fell in love with the color.

IMG_0982

I made this stretch bracelet for an adult.  It’s 7” long which I guess is the standard adult size for a bracelet.

Saturday, September 12, 2009

Darling Baby Bibs!

I love these baby bibs…These are some more things that I made using ideas from the the book “Sewing Projects in an Afternoon” by Susan Mickey.  These are nice because they are actually thick enough to ensure that what the baby is spilling on themselves is not going to soak through (if you can bear for your baby to wear these while eating).  The bunny is probably the best for eating in because it is actually all made of terry cloth in the front which will keep it nice when washed.  I’m not sure how the fleece on the bear and duck will do.  Next time I hope to find a larger variety of terry cloth colors…or I’m just going to have to buy towels to make these with!

  February to May 047  

White bunny on yellow

  February to May 052 

Yellow duck on white

February to May 053

Brown bear on purple

Friday, September 11, 2009

Sleep Mask and Neck Pillow

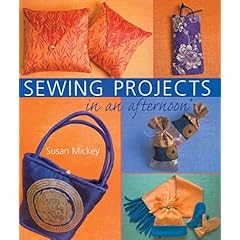
One of the best books I’ve ever found to help the beginning sewer advance their skills at a quick pace is called “Sewing Projects in an Afternoon” by Susan Mickey.  This book is incredible and I love, love, love it!

 Sewing Projects in an afternoon

The instructions are straight forward and the projects are pretty much classy things that you wouldn’t mind having…rather than some of the what I call “country cottage” projects that some books have that just are not very elegant let alone functional.  Once you’ve done a few of the projects in it working from beginner and up your skills will have advanced to a much higher level.  The glossary in the back is wonderful and has all kinds of tips and how-to instructions such as “How to Make your own Biased Tape”.  Which I had a difficult time finding anywhere else.

IMG_0906  


I spent maybe two hours all together on this project but I think it’s a lovely gift for someone that you know needs to relax but you don’t want to give them yet another lotion or body butter set that is going to be placed in a drawer and never used.  The best thing is that you get to choose the materials that you think best suit the person that you’re making it for to match their taste and personality.

Thursday, September 10, 2009

Monogrammed Handkerchiefs

The question of what a good homemade gift would be for a man would be.  I really enjoy the process of making a gift for people that I love and care about… Usually it gives me a lot of time where that particular person is on my mind for quiet a chunk of time.  Men in general are the most difficult people to create things for unless you are very intimate with them and happen to know their size and have some idea of something they may need (such as a shirt).  However, I figured out that monogrammed handkerchiefs are quiet a classy gift and also don’t take up to much time.  Besides they’re one size fits all which is even better!  I made some for my FIL one year for Christmas while he and my MIL were on their mission to the Freiberg Temple.  He told me a while ago that he still uses them all the time. Here is an example of set that I made for my younger brother recently that I intend to gift him (among other things) for Christmas.  It cracks me up that his initials spell “Mr. B”.

IMG_0903

How I made it was to first find a font I liked from my word processing program and printed them out in the size and spacing that I wanted.  Then I placed the paper under the hankie in the location I wanted the letters and took a disappearing ink pen and traced the letters (the great think about these pens is if you make a mistake you can wait for a while (about 24-48 hours) for the marks to disappear or just wash the item with a little water and voila it’s off).  Then I did a trailing stitch because it’s more raised than some of the others.  This stitch is accomplished by split stitching along the lines and then working in a line of closely spaced satin stitches over them.

I personally think these look quite nice…I hope my brother does too.  

Wednesday, September 9, 2009

Crafter’s Apron

My friend Jen was really excited about a website that had lots and lots of links to various patterns of vintage aprons on it—most of which are free.  So she sent me the link.  I really am hoping to try a lot of the various patterns for aprons because they are something that is functional and can have it’s own theme or match that of the room you use them in and be a decorating element.

I found this cute multi-pocket craft apron pattern from http://www.scribd.com/doc/3017653/apron-Pattern.

I love it!

IMG_0909

It’s really fun.  They show it in a different color for each piece to use up scraps…but as I don’t have that many pieces of scraps that are big enough and/or go with each other, I decided to just go with this sparkly purple material I’ve been hording for the past year and a half…I had no real use for it except to do a chain quilt…that I never got more than one other set of squares from…but I really like this sparkling stuff. 

The pockets are my favorite element because think of all of the things you could put in them while you’re working on a project and be able to have them close at hand without spreading them out on a table or something that your climbing children can get at.  I made the thinner pocket exactly the right size for a pair of sewing scissors and when they’re in it you can’t see them—another great feature for those of us with young children.